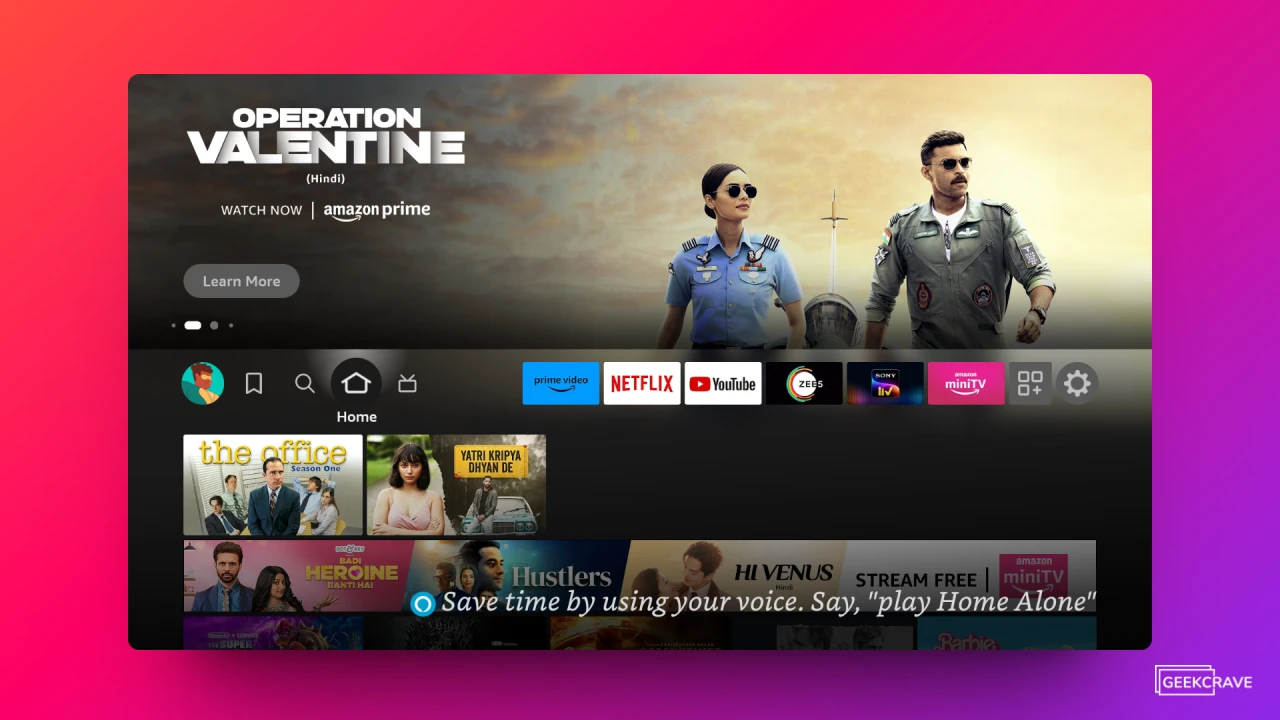
I recently purchased an Amazon Fire TV Stick, and I must say, it’s a fantastic device. It’s incredible how this tiny gadget can turn my regular TV into a smart one. While the Fire Stick offers nearly everything I’d want in a streaming device, capturing screenshots isn’t currently an option.
Unfortunately, there’s no built-in way to take screenshots or recordings on the Fire TV. However, this doesn’t necessarily mean it’s impossible to capture them. Thankfully, there are several workarounds to take screenshots on your Fire TV Stick, even though it doesn’t offer this feature by default.
Since the Fire TV Stick essentially operates on an Android platform, we can utilize the ADB (Android Debug Bridge) to capture screenshots from a PC. Alternatively, we can use a third-party app like Apps2Fire to take screenshots on Fire TV directly from an Android device.
Easily Install Cinema HD APK on Amazon Fire Stick [Latest]
Install the Cinema HD APK on Fire Stick, Android TV, and PC. Follow these simple steps to download and set up Cinema HD.
In this guide, I’ll walk you through both methods in detail, so you can easily take screenshots on your Amazon Fire TV Stick. So, if this is something you want to learn, keep reading the article till the end.
How to Take a Screenshot on Amazon Fire Stick
Taking screenshots on an Amazon Fire TV is not as straightforward as on a mobile device or PC. However, with a few extra steps, you can capture high-quality screenshots on your Fire Stick to share with others. Let’s dive in and see how it’s done.
Prerequisite
To take screenshots on your Amazon Fire Stick, here’s everything you’ll need:
- Amazon Fire Stick with ADB Debugging enabled.
- A WiFi network that you connect your Fire TV and PC/Mobile simultaneously.
- An Android smartphone with the Apps2Fire App installed.
- Windows/Linux/Mac computer with ADB (Android Debug Bridge) tool installed.
First, enable ADB Debugging on the Fire Stick
To set up the Fire Stick for taking screenshots, the first step is to enable ADB Debugging. This will allow us to remotely connect to the Amazon Fire TV Stick over WiFi. This is necessary regardless of whether you plan to take screenshots using an Android mobile or a PC.
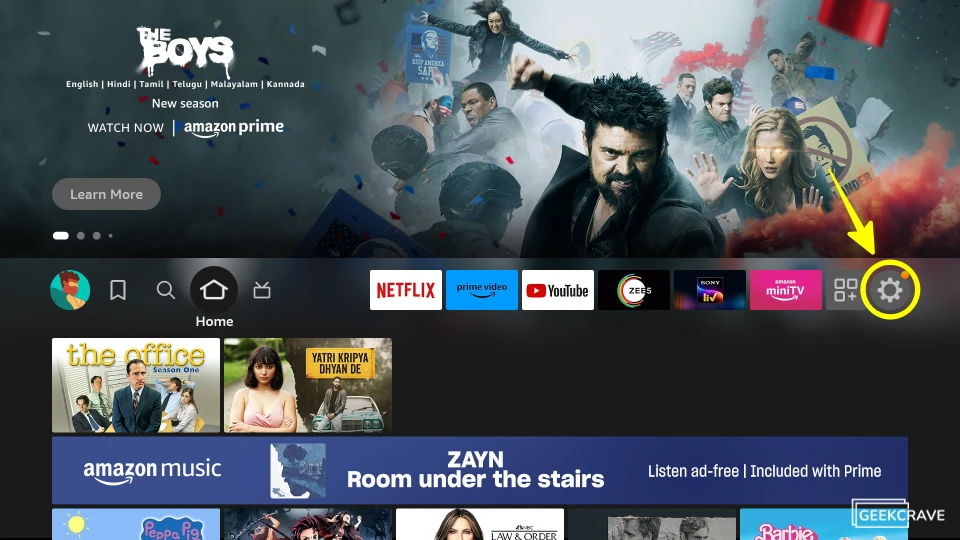
Step 1: From the home screen of your Fire TV, select Settings.
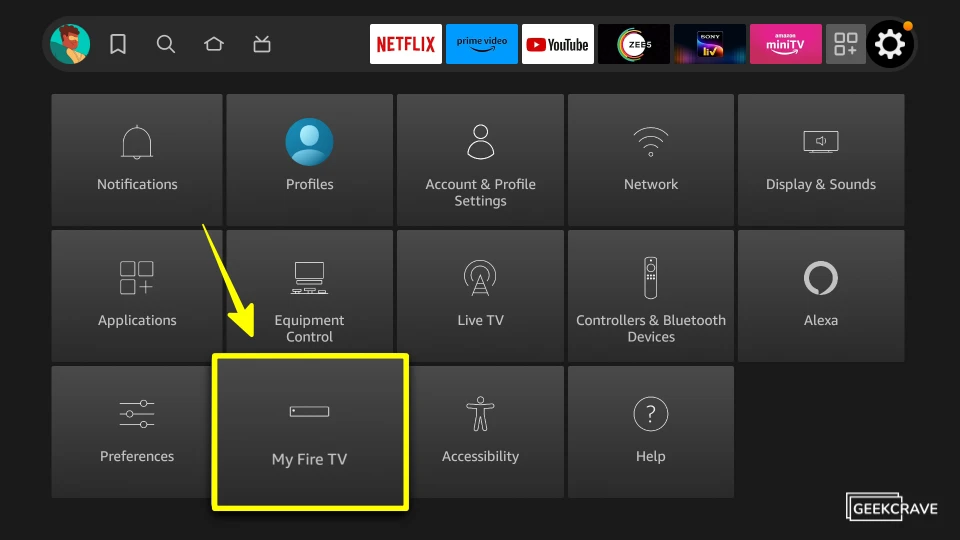
Step 2: Next, under Settings, select My Fire TV.
Step 3: In the My Fire TV settings, select About, then navigate to Fire TV Stick. (The name may vary depending on your Fire Stick model, such as Fire TV Stick 4K or Fire TV Stick Lite).
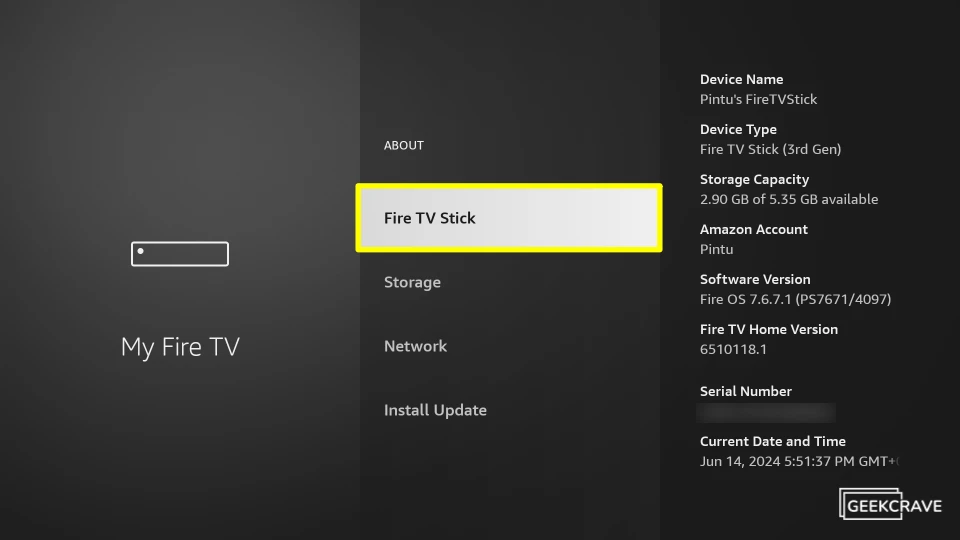
Step 4: Now press or select the name of your Amazon FireStick Seven Times to enable Developer Options. Once that is done, go back to the previous menu, and you should now see the Developer Options menu.
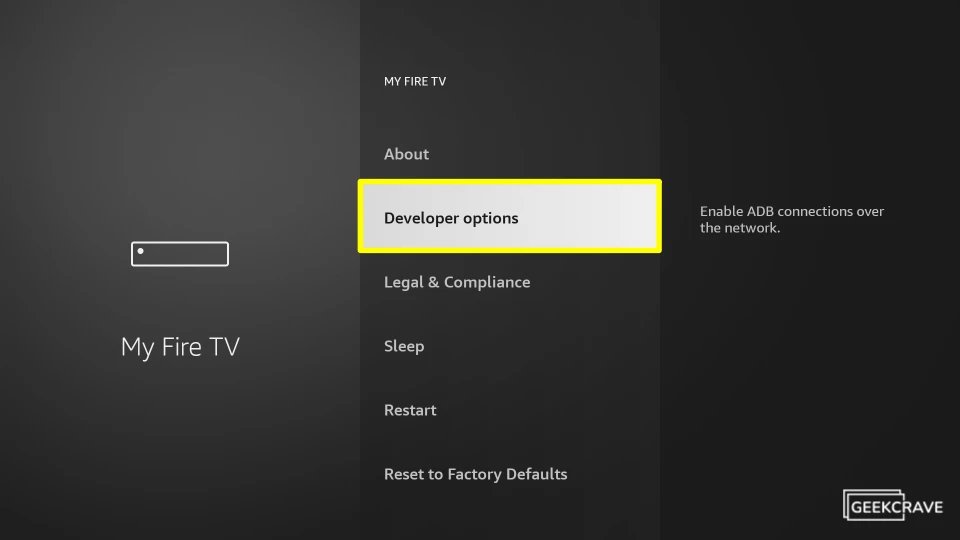
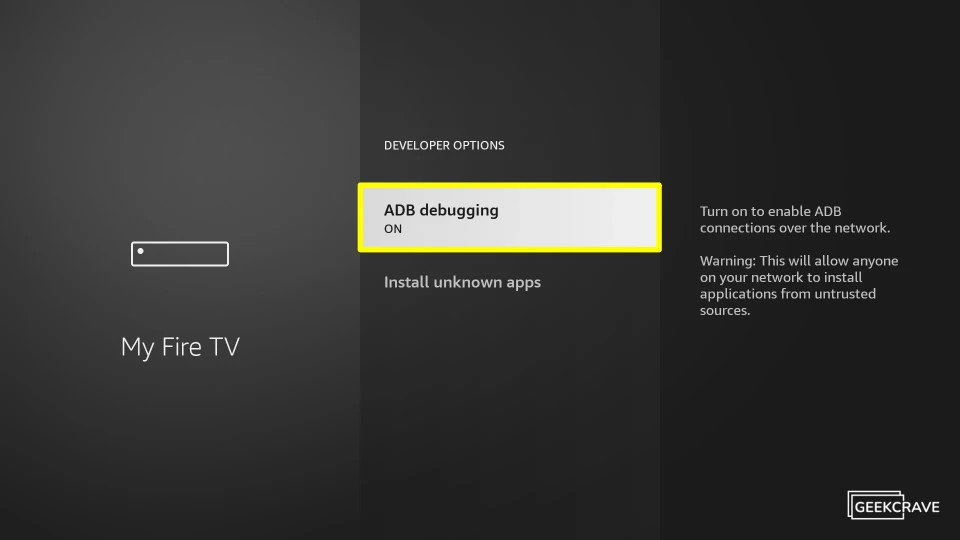
Step 5: In the Developer Options menu, choose ADB Debugging and turn it on.
Method 1: Take Screenshots on Amazon Fire TV Stick using an Android Mobile
If you use an Android device, you can easily take screenshots of your Fire TV using an app called Apps2Fire. This app connects to your Fire Stick via Wi-Fi and allows you to capture screenshots.
After the initial setup, you can take screenshots with a single tap in the app. Additionally, it offers various other features such as sideloading apps, uploading files from your mobile to Fire TV, pausing and restarting Fire TV, and more.
Step 1: Ensure that both your Android device and Amazon Fire Stick are connected to the same WiFi network.
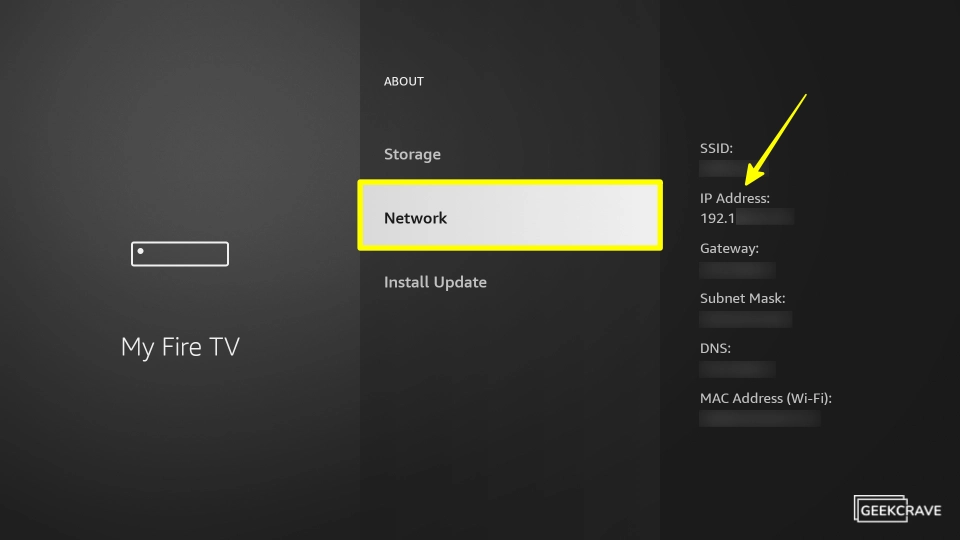
Step 2: Now, open the Settings menu on your Fire Stick. Select My Fire TV > About > Network. In the Network section, you should see the IP Address of your FireStick. Note down the IP address from the right-hand pane.
Step 3: Now, download and install the free Apps2Fire app on your Android device.
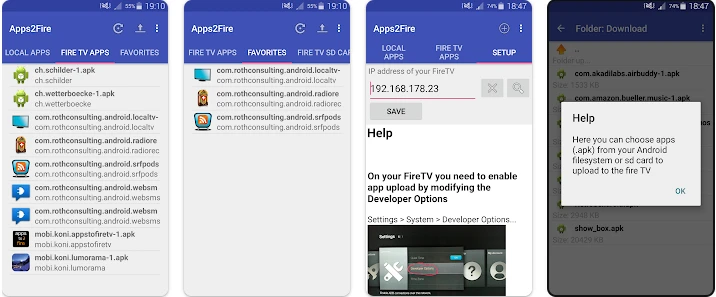
Step 4: Once installed, launch the Apps2Fire app and tap on the three dots (⋮) at the top right corner then select SETUP, or navigate to the SETUP tab at the very end.
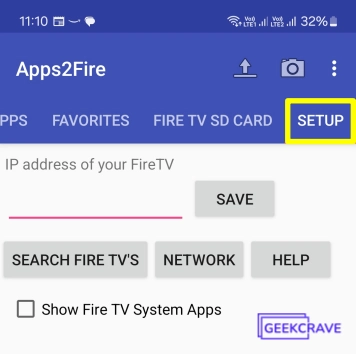
Step 5: Now, enter the IP address you noted down earlier into the text field and tap SAVE. Once you tap on SAVE, your Fire Stick will be connected to Apps2Fire. If you encounter an error, you’ll need to enable USB Debugging on your Fire TV. Look for a prompt on your TV screen to enable this.
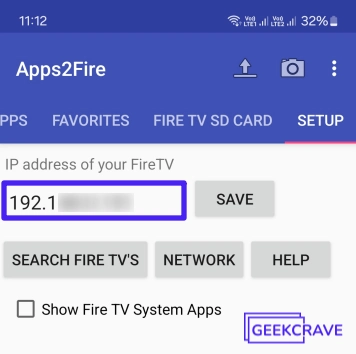
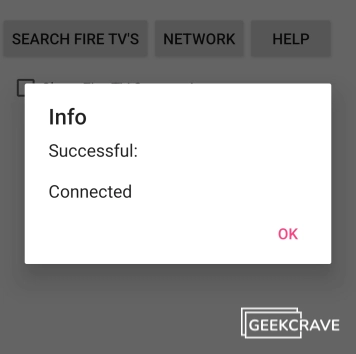
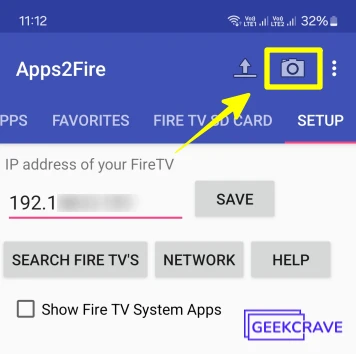
Step 6: Once Apps2Fire is successfully connected to your Fire Stick, tap on the Camera icon at the top of the app. This will capture a screenshot of the current screen on your Amazon Fire TV and save it to the internal storage of the Fire Stick. In the next prompt, you’ll see the screenshot’s filename. Remember it, and tap OK.
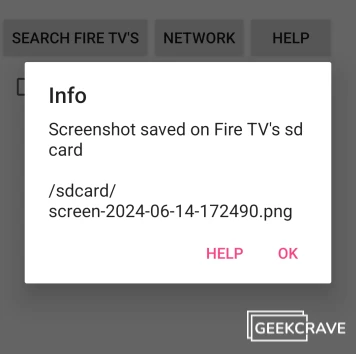
Step 7: In the Apps2Fire app, switch to the Fire TV SD Card tab. Scroll down and find your screenshot by its name. Tap on the screenshot, and then select Download to save it to your Android device.
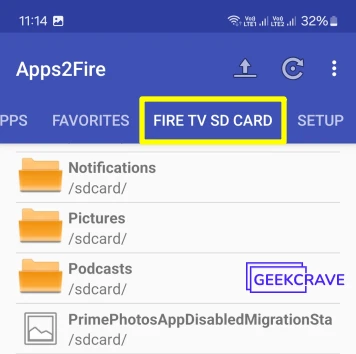
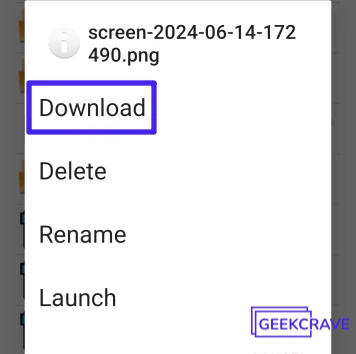
That’s it. Now the screenshot has been downloaded and saved on your Android device.
How to Access the Screenshot on Your Android Device
If you’re using Android 11 or above, accessing screenshots taken with Apps2Fire can be a bit tricky. Apps2Fire saves screenshots in the Data folder, and due to Google’s restrictions on accessing Data and OBB folders, you won’t be able to access the screenshots with your default file manager or gallery app.
However, it is possible to access the Data folder using third-party file manager apps like FV File Manager or Files. Once you have installed the app, launch it and navigate to Storage > Android > Data. In the Data directory, look for the folder named mobi.koni.appstofiretv to find your screenshots.
Method 2: Take Screenshots on Amazon Fire TV Stick using a PC
You can use your PC (Windows, Mac, or Linux) to take screenshots on your Fire TV using the ADB (Android Debug Bridge) utility. Using ADB commands might seem intimidating for beginners, but don’t worry — I will guide you through each step to make it simple.
Step 1: Download the ADB platform tools for your operating system (Windows, Mac, or Linux). Once downloaded, extract the zip file into a folder you can quickly access.
- Download ADB Platform tools for Windows
- Download ADB Platform tools for Mac
- Download ADB Platform tools for Linux
Step 2: On your computer, browse to the folder where you extracted the ADB platform tools. Once you’re in the platform-tools folder, type CMD in the address bar and hit Enter. This will open the Command Prompt.
Alternatively, you can press Shift + right-click anywhere on the Windows Explorer screen and select Open Powershell Window here.
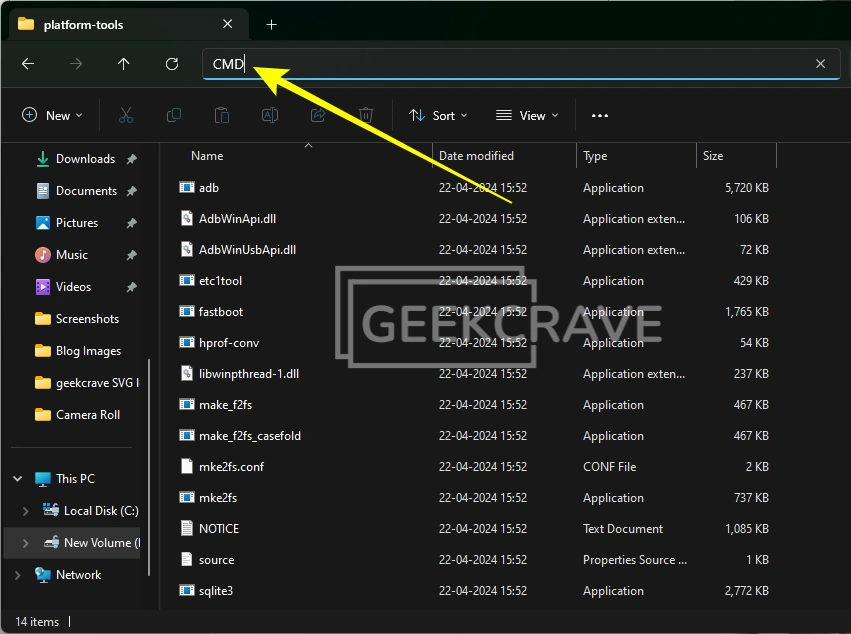
Step 3: Now, open the Settings menu on your Fire TV Stick. Select My Fire TV > About > Network. In the Network section, you should see the IP Address of your FireStick. Note down the IP address.

Step 4: On your PC, enter the following command in the Command Prompt and press Enter. Ensure your PC and Fire TV Stick are connected to the same WiFi network. (Replace “IP Address” with your actual IP address.)
adb connect IP Address:5555
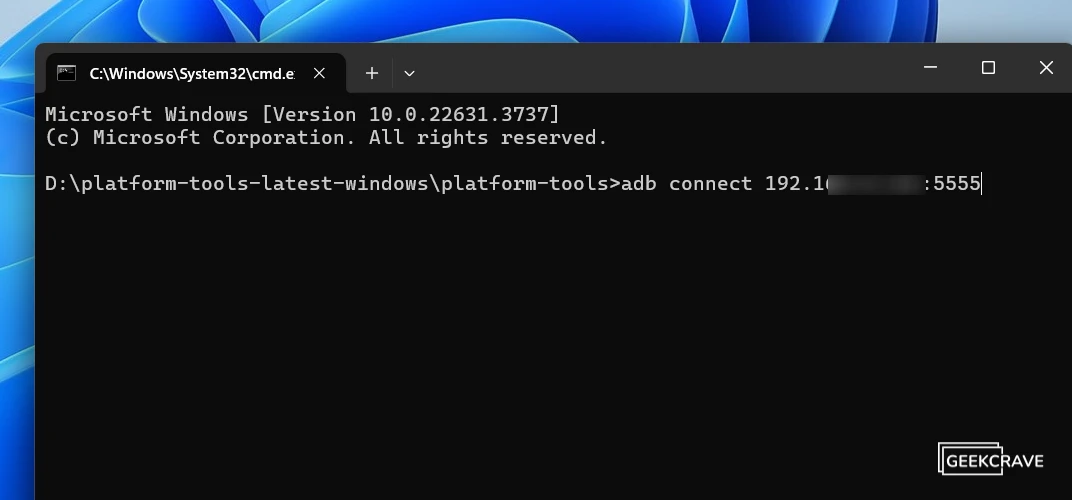
Step 5: A prompt will appear on your TV screen after entering the above command. Accept the prompt on your Fire Stick. Then, run the same command again. This time, you should see a message that you’re already connected.
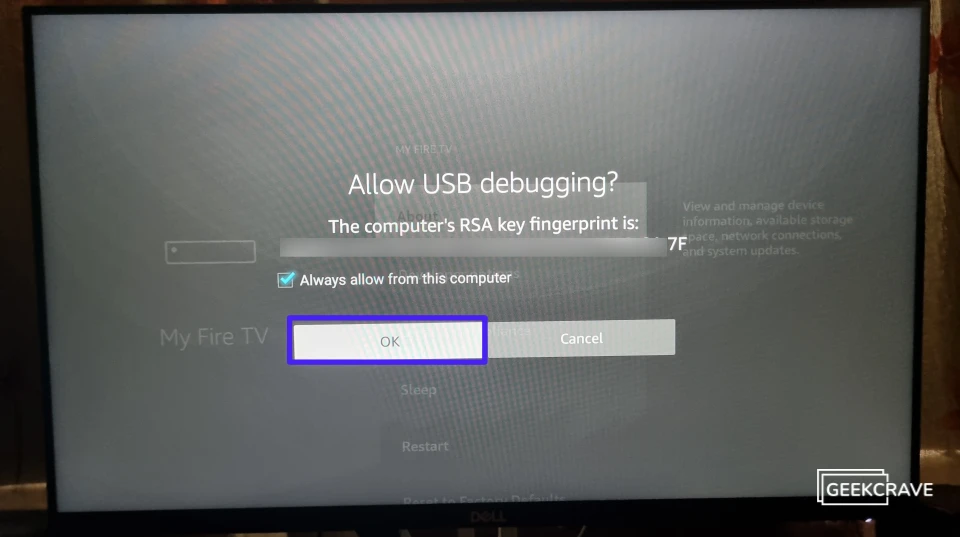
Step 6: Once you’ve connected your Fire TV to your computer using ADB, navigate to the screen on your Fire TV that you want to capture. Then, enter the following command in the Command Prompt to capture the screen. (Replace “filename” with the file name of your choice.)
adb shell screencap -p /sdcard/filename.png
Step 7: The screenshot is now saved on your Fire Stick’s internal storage. Next, we’ll use the following command to copy this screenshot from your Fire TV to your PC. (Replace “filename” with the filename you used earlier.)
adb pull /sdcard/filename.png
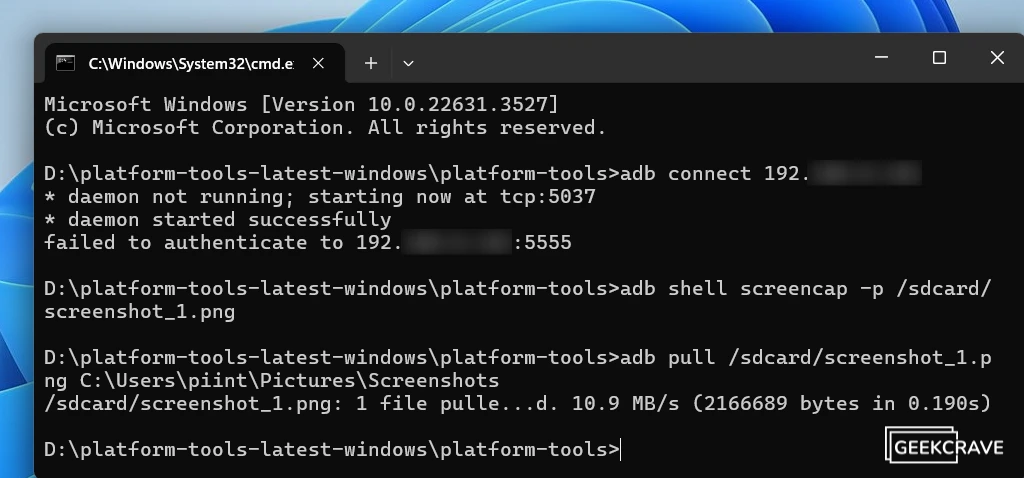
After executing this command, you’ll now see the Fire Stick screenshot inside your ADB folder — the same folder where you opened the Command Prompt window. You can find the screenshot images among the extracted files.
Tip
If you want to save the Fire TV screenshots to a specific folder on your PC, add “folder-location” to the end of the previous command, replacing “folder-location” with the actual folder you want to use, such as C:\Users\username\Pictures. Here’s how it will look:
adb pull /sdcard/filename.png folder-location
That’s it! You’ve now successfully captured the screenshot on your Amazon Fire TV Stick using ADB commands.
Wrapping Up
I often use screenshots when explaining things online or helping someone with app settings. Since taking screenshots on a mobile device or PC is so easy, we’ve become accustomed to sharing quick screenshots whenever we need to show something to our friends or colleagues.
Likewise, when using my Fire TV, sometimes I want to share what I’m watching with friends. Taking a picture of the TV screen with my phone works, but it’s not as practical as taking a screenshot. I’ve often wanted to take a proper screenshot directly from my Fire TV.
If you’ve had the same thought, you can now easily take screenshots on your Firestick using the methods explored in this guide. Lastly, if you have any questions about this guide, feel free to leave a comment below.
