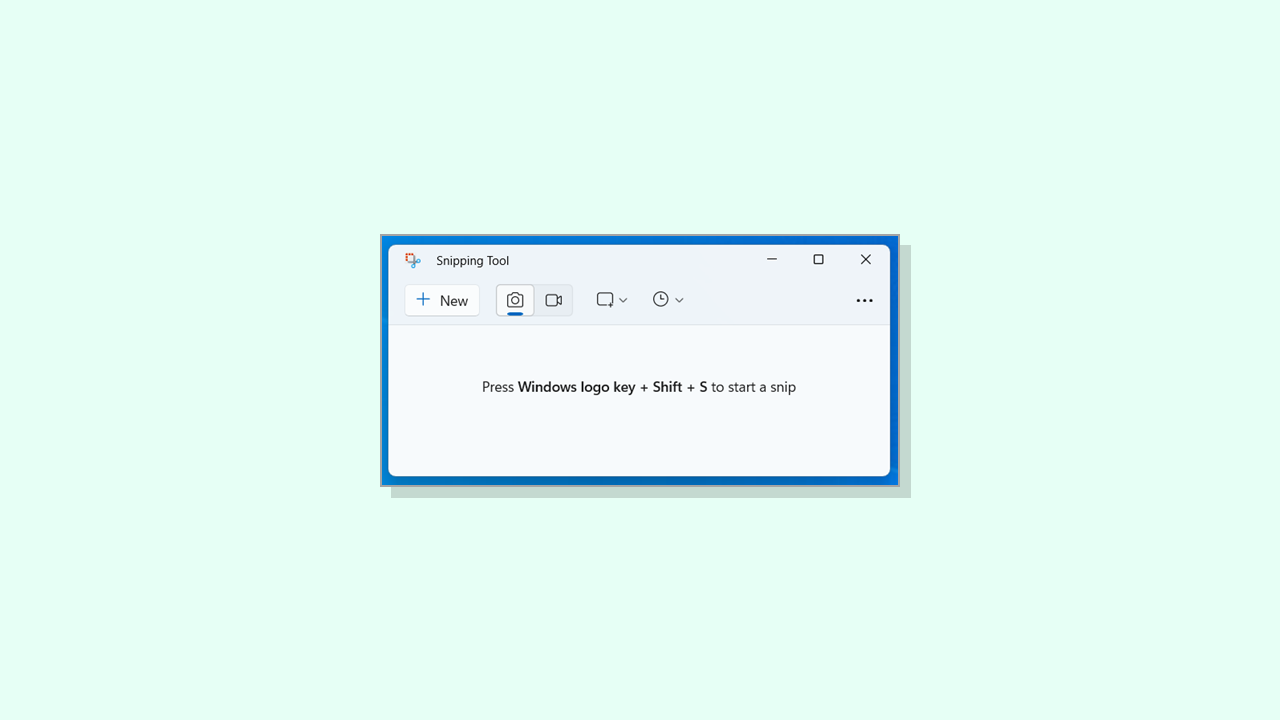
In this guide, I’ll show you several methods to completely uninstall the Snipping Tool from your Windows computer — using Windows Apps settings, PowerShell, or the Winget command line. Additionally, if you prefer to disable the Snipping Tool rather than uninstall it entirely, I’ll provide a couple of methods for that.
Furthermore, I’ll guide you through disabling the Snipping Tool ‘Print Screen’ and Win + Shift + S shortcut so that you can remove Snipping Tool as the default Windows Screenshot tool and capture screenshots with another utility of your choice. So, if this is something you’re interested in learning, continue reading.
What is the Snipping Tool in Windows
Snipping Tool is the default screenshot-taking app on Windows 10 and Windows 11. It comes pre-installed on every version of Windows, since Windows Vista — allows you to capture screenshots easily. You can either press the Print Screen (PrtSc) key on the keyboard or the combination of the Windows logo key + Shift + S to take a screenshot or snip.
After capturing a screenshot, the Snipping Tool offers features to annotate or highlight the captured screenshot and save or share it. Moreover, with the Snipping Tool, you can extract text directly from your captured screenshot, allowing you to choose and copy specific text or utilize the tool to copy all text from the snip.
How to Uninstall or Disable the Snipping Tool in Windows
While the built-in Windows Snipping Tool serves the basic function as intended, many users prefer more advanced screen-capturing tools like LightShot, Snagit, Greenshot, or PicPick. If you’re also using an alternative software for capturing screenshots you can safely uninstall the Snipping Tool. After all, how many tools do we need to take screenshots?
Alternatively, if you don’t intend to use any third-party tool for screen capture besides the built-in Snipping Tool, but encounter issues like crashes or certain functions not working properly then a quick reinstall can often resolve the problem. Below I’ll show you various methods to both fully uninstall and disable the Snipping Tool.
Easily Disable Bixby on Your Samsung Galaxy Phone in 7 Ways
With our comprehensive guide, discover step-by-step instructions on how to completely disable Bixby on your Samsung Galaxy device.
Method 1: Uninstall the Snipping Tool via Windows Apps
The easiest way to uninstall the Snipping Tool is via Windows Apps. Whether you’re on Windows 11 or 10, it only takes a few clicks to remove it.
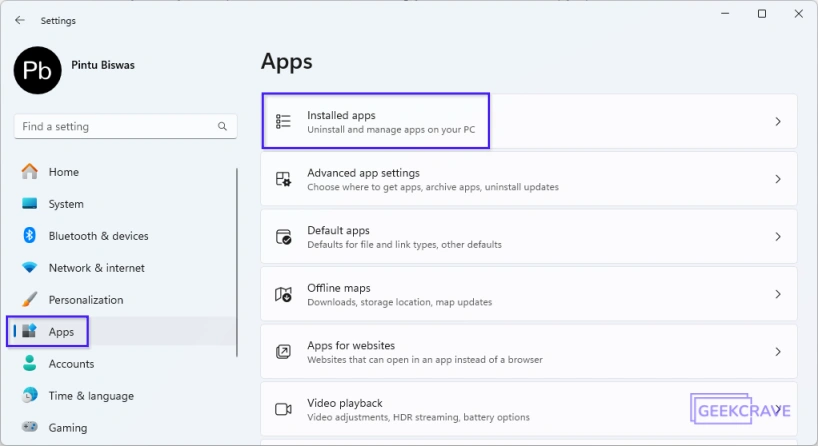
1. On your Windows 11 PC, open Settings > Apps and then select Installed Apps.
2. In the list of installed apps, search for “snipping” Click the three dots (…) menu next to Snipping Tool, then choose Uninstall.
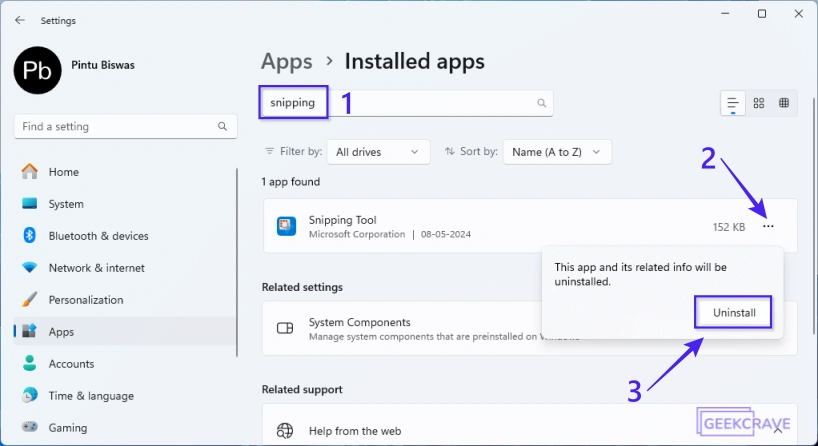
3. After clicking the Uninstall button, a confirmation window will appear saying “This app and its related info will be uninstalled.” Click the Uninstall button again to finally remove the Snipping Tool from your Windows PC.
Tip
The process for uninstalling the Snipping Tool differs slightly on Windows 10. Here’s how you can uninstall both the Snipping Tool and the Snip & Sketch on Windows 10.
- Uninstall the Snipping Tool on Windows 10: Go to Settings > System > Optional features > Select the Snipping Tool and click the Uninstall button > Click the Uninstall button again to finally remove the Snipping Tool from Windows 10.
- Uninstall Snip & Sketch on Windows 10: Go to Settings > System > Optional features > Select the Snip & Sketch and click the Uninstall button > Click the Uninstall button again to finally remove the Snip & Sketch app from Windows 10.
Method 2: Uninstall the Snipping Tool using PowerShell
Another method to uninstall the Snipping Tool from your PC is by using PowerShell. You can easily remove it by executing a couple of commands.
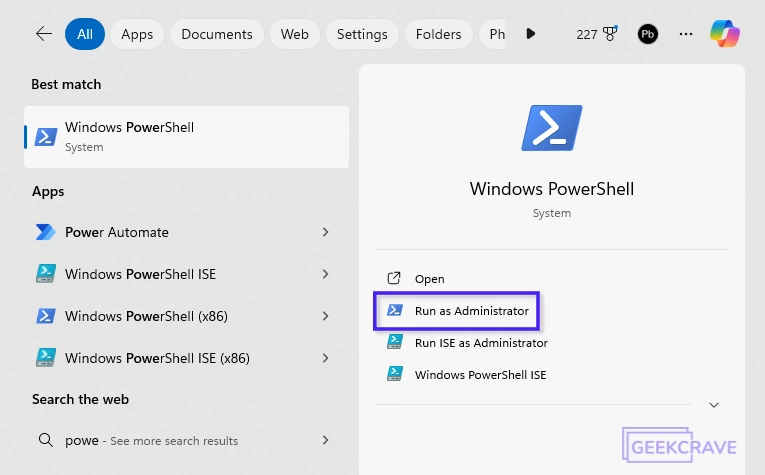
1. To uninstall the Snipping Tool using PowerShell, you have to launch it with administrator privileges. You can do this by either Right-clicking the Start button and selecting Terminal (Admin), or by searching for PowerShell in the Start menu, then right-clicking on the result and selecting Run as administrator.
2. First off, run the command get-appxpackage ScreenSketch to check whether the Snipping tool has already been installed.
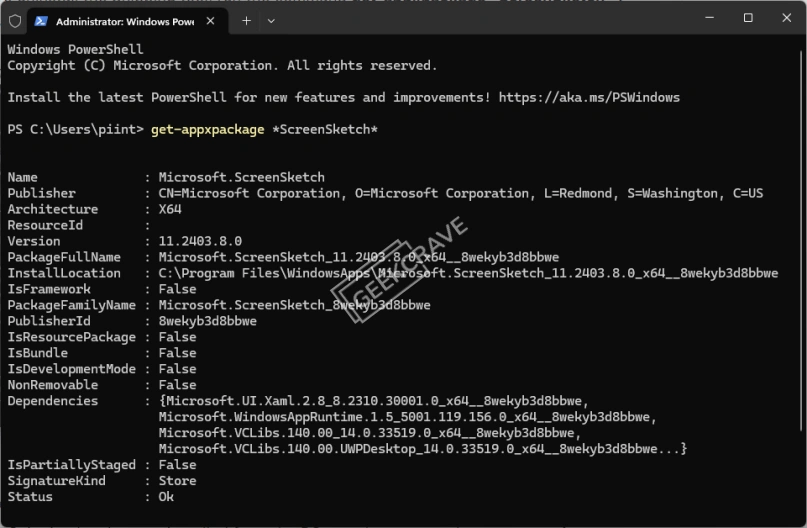
3. Next, run the below command to uninstall the Snipping tool.
get-appxpackage ScreenSketch | remove-appxpackage
Unlike the initial method via Windows Apps, using PowerShell won’t prompt you for confirmation. To verify the Snipping Tool’s removal, run the command get-appxpackage ScreenSketch. If no details appear, the Snipping Tool has been successfully uninstalled.
Method 3: Uninstall Snipping Tool using the Command Prompt
You can also uninstall the Snipping tool using Winget. Winget is the Windows Package Manager, a free and open-source tool developed by Microsoft for Windows 10 and 11. It functions as an app installer and offers a command-line interface for managing software.
In this method, we will run the winget list command to show the list of installed apps on your PC. Once you find “Snipping Tool” and its version number. You can easily uninstall it by running a simple command.
1. Launch the Command Prompt as administrator. You can search for Command Prompt in the Start menu, right-click on the result, and select Run as administrator.
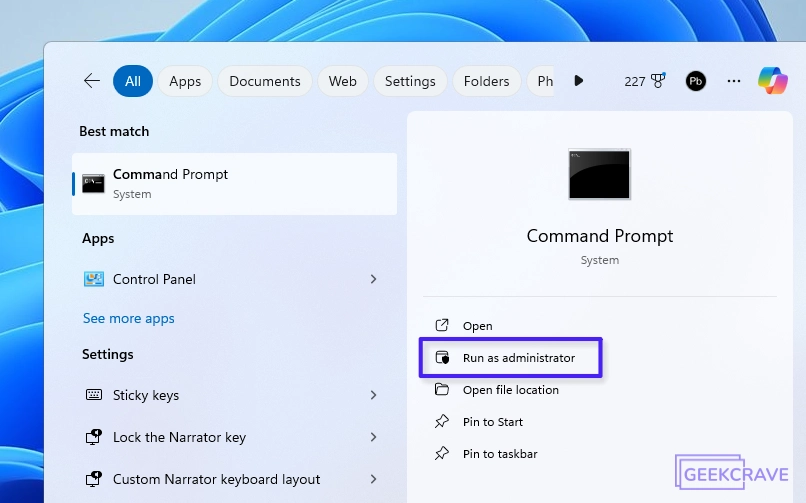
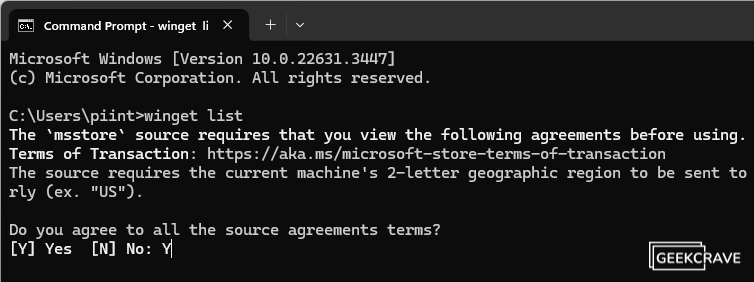
2. Type winget list and press Enter. This shows a list of all installed apps on your computer. If Winget isn’t already installed, you’ll be prompted to agree to the source agreements. Simply press Y (for Yes) to accept the terms and proceed. Winget will be installed on your system in a moment.
3. After Winget is installed on your PC, run winget list again to show the list of installed apps on your computer. Find “Snipping Tool” in the list and note its version number.
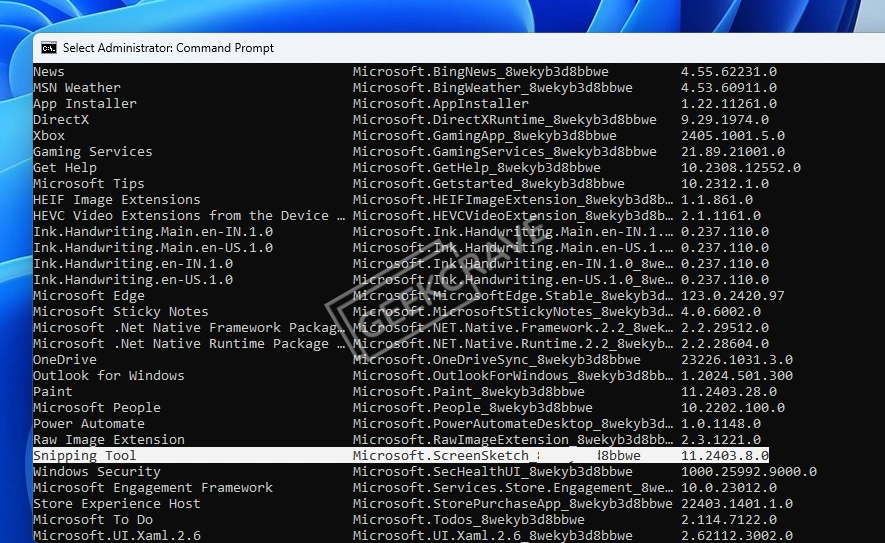
4. Finally, run the following command, replacing the version number with the actual version you found.
winget uninstall –name Snipping Tool –version 11.2403.8.0
That’s it! after running the above winget command, the Snipping Tool will be uninstalled from your system.
How to Re-Install Snipping Tool
If you want to reinstall the Snipping Tool on your Windows 11 or 10 PC, you can download and install it again from the Microsoft Store. To do so, go to the Microsoft Store, search for ”Snipping Tool”, and click Get.
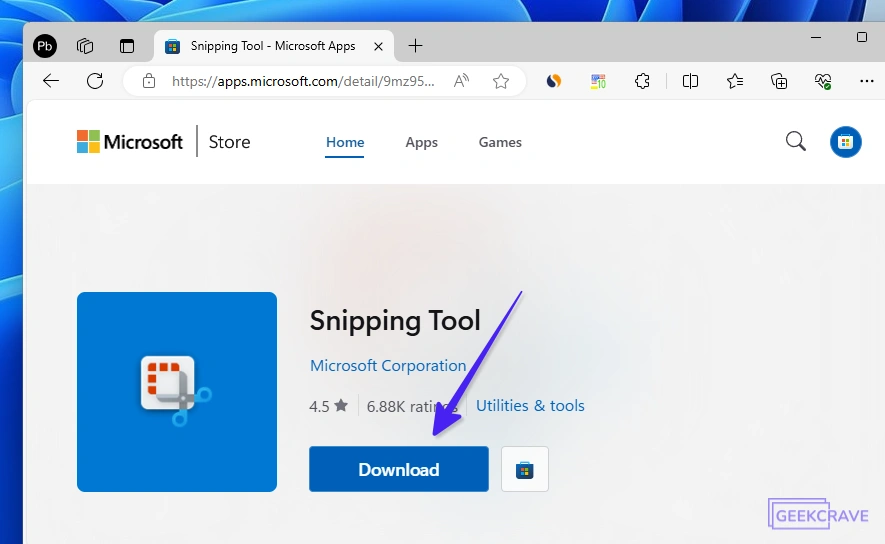
Now the latest version of the Snipping Tool will be downloaded and installed on your Windows 11 PC. You can also use the same steps to reinstall the Snipping Tool on a Windows 10 computer.
How to Remove Snipping Tool as Default Windows Screenshot Tool
You may already know that by default, both Win + Shift + S and the Print Screen key trigger the Snipping Tool. If you prefer to use another screen-capturing tool like Lightshot or Snagit and want to assign these hotkeys to your preferred utility, you’ll need to take a few steps.
Unfortunately, simply uninstalling the Snipping Tool won’t re-map the hotkeys. To re-map the default Snipping Tool shortcuts, first, you need to disable both the Print Screen and Win + Shift + S shortcuts.
I will show you how to disable both shortcuts, allowing you to remap them to your preferred screenshot utility and finally replace the Snipping Tool as the default Windows Screenshot Tool.
Disable Snipping Tool ‘Print Screen’ Shortcut
Go to Settings > Accessibility > Keyboard. Uncheck ‘Use the Print Screen key to open Snipping Tool’. You can also press the Windows key and search for ‘print screen.’
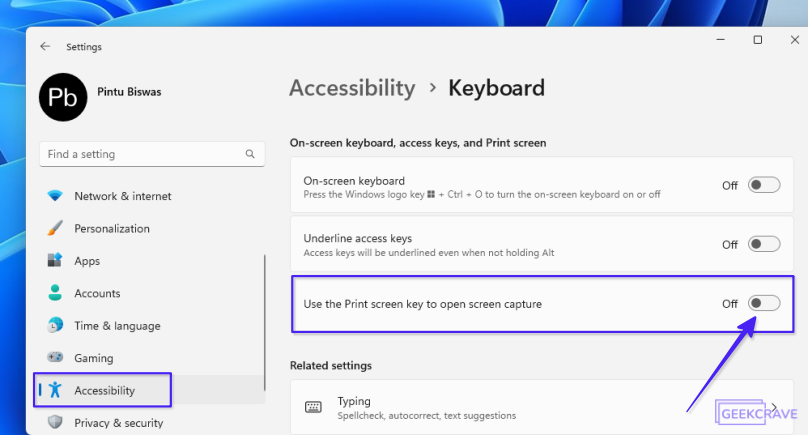
Thats it. From now on, pressing the Print Screen key will not trigger the Snipping Tool.
Disable Win + Shift + S Shortcut
Another default shortcut, Win + Shift + S, also opens the Snipping Tool. To assign this key to a different utility instead of the Snipping Tool, we need to disable it first.
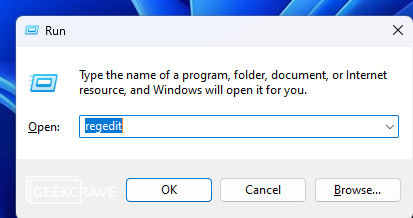
1. Open the registry editor by pressing Win + R, typing ‘regedit‘, and hitting enter. Click ‘yes’ if you encounter the UAC prompt.
2. Go to Computer\HKEY_CURRENT_USER\Software\Microsoft\Windows\CurrentVersion\Explorer\Advanced. In the right pane, right-click, and select New > String Value

3. Name the new string DisabledHotkeys and set its value to S

4. Finally, click OK, close the registry editor, and restart your computer.
Now that we’ve uninstalled the Snipping Tool and disabled the ‘Print Screen’ and ‘Win + Shift + S’ shortcuts, we can map these shortcuts to other screenshot utilities of our choice.
Easily Switch Back to Google Assistant From Gemini in 4 Ways
In this guide let’s explore how you can effortlessly switch back to Google Assistant from Gemini as your default voice assistant.
Goodbye Snipping Tool
Say goodbye to the limitations of the Snipping Tool and unleash the power of your chosen screenshot utility. In this guide, I’ve shown three methods to uninstall the Snipping Tool from your PC. Additionally, I’ve shown you how to remove the Snipping Tool as the default Windows screenshot Tool so that you can map the Print Screen key and Win+Shift+S shortcut for your preferred screenshot utility. Before you go, check out how to install Cinema HD APK on Fire Stick.

